

How Flags Are Made: Inside the Flag Production Process
Flags are more than just pieces of fabric. They represent nations, brands, events, and causes — which means the people who make them have to take every detail seriously. Behind every finished flag is a carefully organized production process that balances print accuracy, strong stitching, and dependable materials. Whether you are ordering custom banners for an event or national flags for a government building, understanding how flags are made helps you know what to look for in a supplier.
This article takes you through the flag production process step by step, from the first digital artwork to the folding and packing of the finished product.
Step 1: Design and Pre-Press Preparation
Every flag starts with an idea, but an idea needs to become a print-ready file before production can begin. During this stage, the artwork is checked, adjusted, and prepared for the specific printing process that will be used.
- Color separation: Complex logos and emblems are divided into individual color layers that the printing equipment can reproduce cleanly.
- File checking: Resolution and proportions are verified so the finished flag looks sharp at its intended size.
- Pre-production proof: A proof or sample is often reviewed before mass production begins — an important step that ensures the design matches customer expectations.
This pre-press stage is sometimes overlooked, but it is exactly where many flag quality issues are prevented before cutting or printing ever happens.
Step 2: Material Selection and Cutting
Flags require fabric that can handle wind, sun, and repeated handling. Depending on the intended use and budget, different fabric weights and materials are selected — from lightweight polyester for indoor display flags to heavier knitted polyester for outdoor use.
Once the material is chosen, it is measured and cut to the correct dimensions. The cutting stage also accounts for the extra fabric needed for hems, seams, and the header — the reinforced strip that runs along the side of the flag where it attaches to the pole.
Step 3: Printing the Design
There are several ways to print a flag, and the production method influences the final look and durability. Three methods are widely used in flag manufacturing:
Screen Printing
Screen printing pushes ink through a fine mesh stencil onto the fabric. It is a strong choice for designs with bold, solid colors and is often used for relatively large orders where color consistency really matters. Because the ink sits on the surface of the fabric, screen-printed flags are known for vivid color, though the design must be planned carefully during color separation.
Dye-Sublimation Printing
Dye-sublimation printing is popular for custom flags with detailed or photographic designs. A design is printed onto special transfer paper, then heat and pressure bond the dye directly into the fibers of the fabric. The result is a design that becomes part of the cloth itself rather than sitting on top of it — which gives good color depth and a soft, natural feel.
Direct Digital Printing
Direct digital printing applies the design straight onto the fabric, similar to a large-format printer. It is a flexible method that works well for smaller quantities or designs with many colors, because there is no need to create screens or stencils first.
Step 4: Heat Setting and Curing
Heat setting is a key step in producing fade-resistant flags — especially when dye-sublimation printing is used. After the design is transferred, the fabric passes through a high-temperature process that locks the dye into the fibers. This curing stage helps the printed colors survive exposure to sunlight and repeated washing, so the flag keeps its appearance over time.
For screen-printed flags, the ink is cured so it adheres well to the fabric and remains flexible enough not to crack when the flag flies and folds in the wind.
Step 5: Cutting, Sewing, and Hemming
Once the fabric is printed and cured, it moves to the finishing area where the actual construction of the flag happens.
First, the printed panels are cut to their final shape. Then the edges are folded over and hemmed. This prevents fraying and gives the flag a clean, finished edge. The hemming process is more important than many people realize — a flag that is cut well but sewn poorly will not last through many days of outdoor use.
High-quality flags typically feature reinforced stitching in the stress points — the areas where wind pressure is highest. Double stitching along the hem and at the corners adds noticeable durability without adding bulk.
Step 6: Hardware and Pole Attachment
A flag is not complete until it can be attached to a pole. The most common finishing options are:
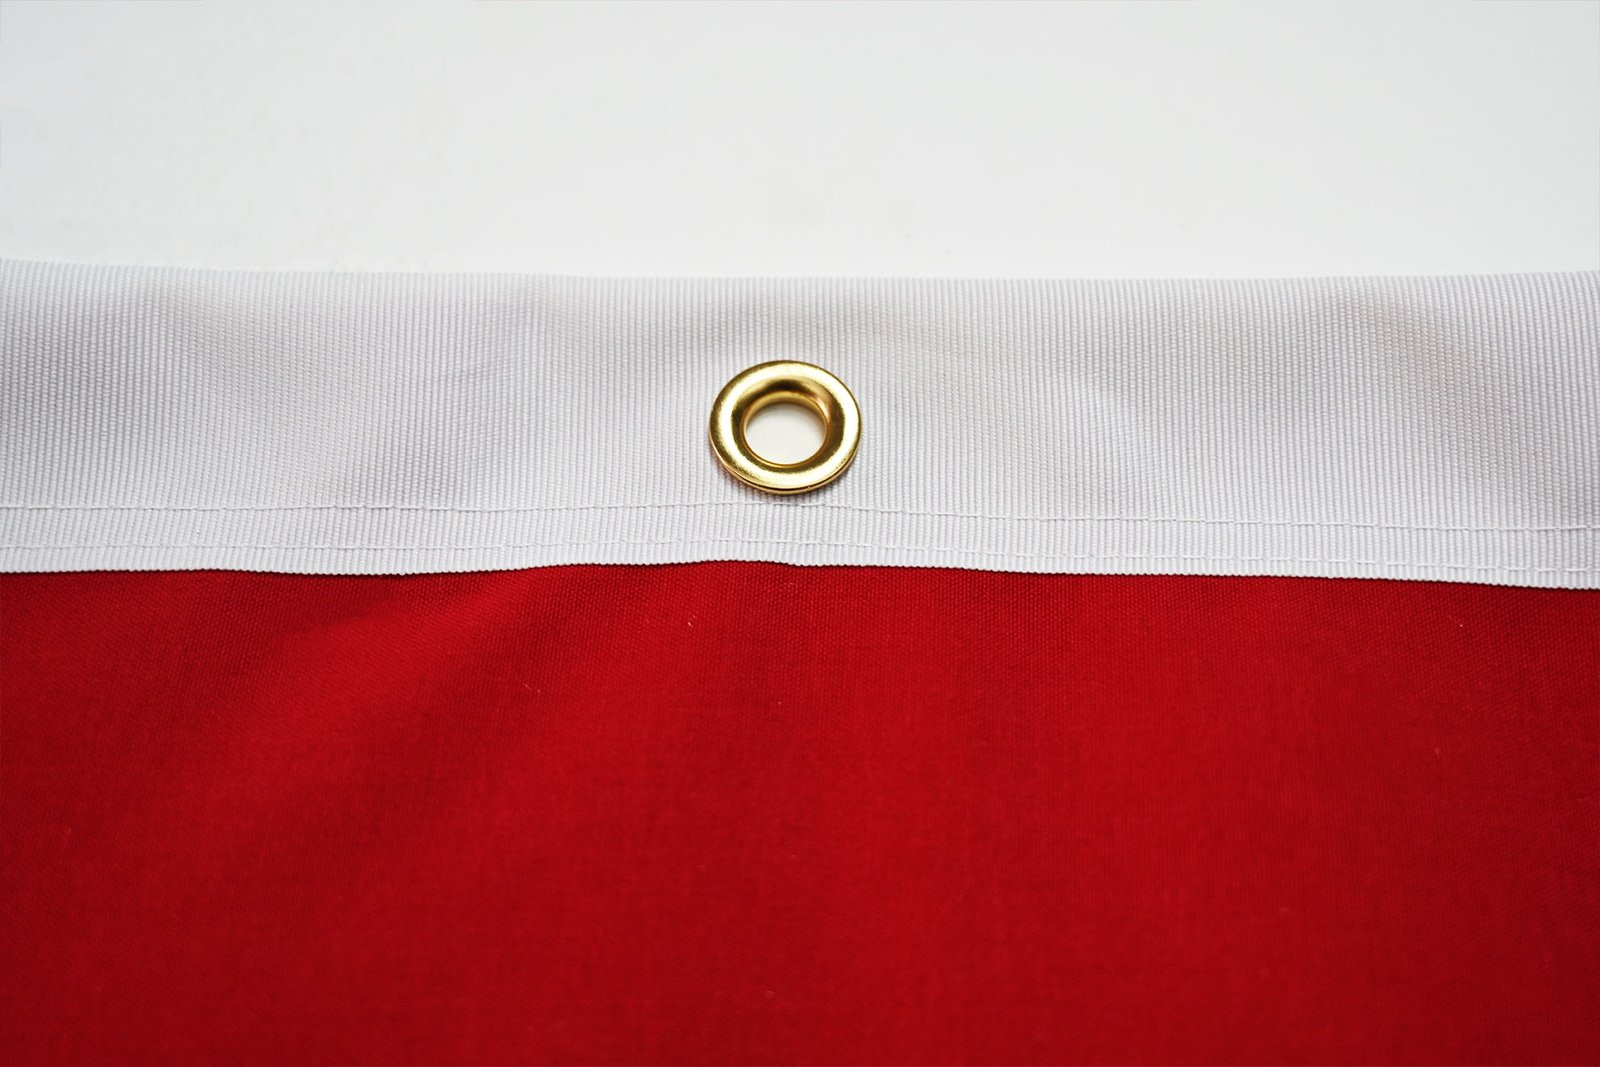
- Header tape: A strong, woven strip sewn along the hoist edge of the flag, preventing stretching during use.
- Grommets: Metal eyelets placed at the top and bottom of the header so the flag can be tied or clipped securely.
- Pole pocket: A sewn sleeve that slides directly over the flagpole — common for indoor flags and presentation banners.
- Rope and toggle: A cord attached to the flag for quick hoisting, often used on larger customs or ceremonial flags.
Choosing the right attachment depends on the type of pole and how the flag will be used. A well-constructed header makes a meaningful difference in how the flag behaves in strong wind.
Step 7: Quality Control and Inspection
Before any flag leaves a production facility, it goes through a final inspection. This is where careful craftsmanship and strict quality control come into play.
- Print quality: The finished design is checked against the approved proof for color alignment and overall accuracy.
- Stitching review: Seams, hems, and corners are examined for even stitching and correct tension.
- Hardware check: Grommets are inspected for secure placement, and header tape is examined for strength.
- Cleanliness and trimming: Loose threads are removed and any excess material is trimmed for a neat final appearance.
Some flags are also spot-checked by being unfolded and inspected under bright light. This step helps catch subtle printing flaws that may not be obvious at first glance.
Step 8: Folding, Packaging, and Shipping
The final step is preparing the flag for its journey to the customer. Flags are folded carefully to avoid sharp creases that can damage printed designs, especially on coated or sublimated fabrics. Bulk orders are packed in protective wrapping, and smaller custom orders may be individually bagged.
Proper folding and packing may seem like a simple detail, but it protects the product during shipping and makes it easier for the end user to display the flag right away with minimal ironing or touch-up needed.
